Ask ten Indians to explain the difference between biryani and pulao and you will get eleven different answers — all delivered with complete confidence.
“Biryani uses basmati rice, pulao does not.” Wrong. Both typically use long-grain rice.
“Biryani always has meat.” Wrong. Vegetable biryani and paneer biryani are as legitimate as any other.
“Pulao is just a simpler, less spiced biryani.” Closer — but still not the whole story.
The biryani vs pulao debate has been going on at Indian dining tables for as long as both dishes have existed. And the reason the debate never ends is that most people are arguing about the wrong things — the ingredients, the colour, the spice level — when the real difference lies in something far more fundamental: how the rice is cooked.
The One True Difference: The Cooking Method
Strip away all the regional variations, all the family recipes, all the restaurant interpretations, and you are left with one defining distinction between biryani and pulao.
Pulao uses the absorption method. The rice and other ingredients — vegetables, meat, legumes — are cooked together in a measured quantity of stock or water. Everything goes into the same pot, absorbs the liquid together, and finishes cooking simultaneously. The flavour infuses the rice as it cooks. The dish comes together in one continuous process. The result is fragrant, well-seasoned, and cohesive — a single unified dish.
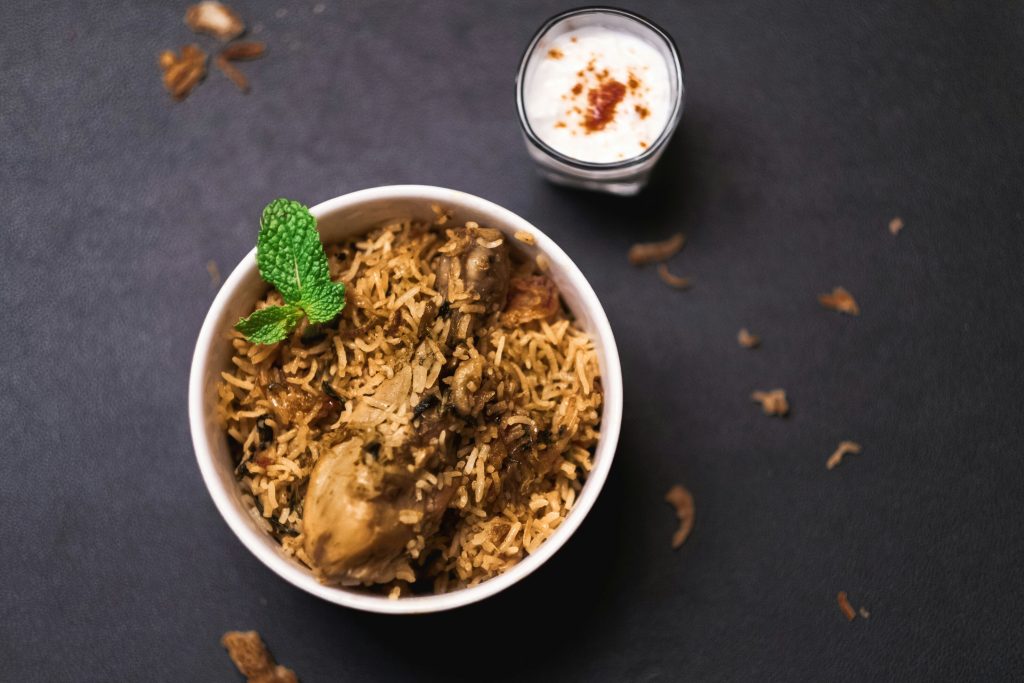
Biryani uses the dum method. The rice and the main ingredient — meat, vegetables, or paneer — are cooked separately first. The meat is prepared in its own intensely spiced masala. The rice is parboiled separately in spiced water until it is about 70% cooked. Then the two are layered in a heavy-bottomed vessel — masala at the bottom, partially cooked rice on top — sealed tightly with a lid (traditionally with dough), and finished over a very low flame for 20–30 minutes. The steam trapped inside the sealed pot does the final cooking, forcing the flavours of the masala upward into the rice while the rice’s starch falls downward into the masala.
This is the essential truth: pulao is cooked as one. Biryani is assembled in layers and steam-finished.
Everything else — the spices used, the richness of the gravy, the colour of the rice, whether it contains meat — these are variables that differ from recipe to recipe and region to region. The method is what defines the dish.
A Brief History of Both Dishes
Understanding where these dishes came from makes the distinction even clearer.
Pulao — also spelled pilaf, pilau, or polo depending on which part of the world you are in — is one of the oldest rice preparations in the world. Its origins trace back to ancient Persia, where cooking rice in seasoned broth rather than plain water was developed as a technique for producing more flavourful, aromatic rice. The dish spread across Central Asia, the Middle East, and eventually into the Indian subcontinent with trade and migration. Indian pulao absorbed local spices and ingredients but retained its essential character: a single-pot rice dish cooked in seasoned liquid.
Biryani has a more specific origin story — and a more contested one. Most food historians agree that it developed in the royal kitchens of the Mughal Empire, likely in Lucknow and Hyderabad, where Persian culinary traditions met the spice abundance of the Indian subcontinent. The word biryani itself comes from the Persian birian, meaning “fried before cooking” — a reference to the technique of browning the rice or meat before the dum cooking stage. Biryani was royal food: complex, labour-intensive, requiring multiple stages of preparation and specialised knowledge. It was designed to impress.
Pulao, by contrast, was everyday food — nutritious, efficient, beautifully flavoured, but not theatrical.
Regional Variations That Blur the Line
Part of the reason this debate never resolves neatly is that India’s regional food traditions have created so many variations that the categories sometimes seem to overlap.
Hyderabadi Biryani — arguably India’s most famous — is a true dum biryani in every sense. Marinated meat and parboiled rice are layered and sealed, finished over a wood or coal flame. The rice grains are distinct, the masala is intensely flavoured, and a spoonful from the bottom of the pot tastes fundamentally different from one taken at the top.
Lucknowi (Awadhi) Biryani uses a pakki (pre-cooked) method where both the meat and rice are almost fully cooked before layering, and the dum is brief — more a final aromatics-infusion than a cooking stage. It is milder and more fragrant than Hyderabadi biryani.
Kashmiri Pulao is so richly spiced, garnished with fried nuts, saffron, and dried fruits, that it looks like a festive biryani to the uninitiated. But the rice and all ingredients were cooked together in one pot — making it, technically, a pulao regardless of how grand it appears.
Malabar Biryani from Kerala uses short-grain Kaima rice rather than basmati, giving it a completely different texture from the long-grain biryanis of the north. Yet the dum technique is retained, so it remains, definitively, a biryani.
These regional variations show that the ingredients can vary enormously — but wherever the dum technique is used, wherever the rice and filling were cooked separately and brought together, it is biryani. Wherever everything cooked in one pot together, it is pulao.
The Flavour Difference — What You Actually Taste
Beyond technique, biryani and pulao produce genuinely different eating experiences.
Pulao is a unified dish. Every grain of rice carries the same flavour — the gentle warmth of whole spices, the savouriness of the broth, the earthiness of whatever vegetables or meat cooked alongside it. It is balanced, cohesive, and satisfying in a quiet, settled way. A good matar pulao or jeera pulao eaten on a cold evening, with raita and pickle, is one of the most comforting meals in Indian cuisine.
Biryani is a dish of contrasts. Because the masala and rice are cooked separately and layered, different spoonfuls taste different. A spoonful taken from the bottom — where the masala sits — is intensely flavoured, dark, almost caramelised. A spoonful from the top — pure parboiled rice — is light and fragrant. A spoonful from the middle contains both. The variation within a single serving is the point. It is designed to be explored rather than simply consumed.
A well-made biryani also has textural complexity that pulao does not attempt. Caramelised fried onions layered into the rice provide pockets of sweetness and crunch. Fried nuts add richness. The meat, having cooked in its own masala before being sealed with the rice, has a depth and tenderness that meat cooked in a single pot simply cannot match.
Why the Confusion Exists — And Why It Matters
In practical terms, the biryani-pulao confusion persists for one simple reason: commercial shortcuts.
A proper dum biryani takes three to four hours to make correctly — marinating the meat overnight, preparing the masala, parboiling the rice, assembling the layers, sealing the vessel, and finishing over a low flame. This is not feasible in a high-volume restaurant kitchen turning out hundreds of plates per hour.
So many restaurants cook the rice and masala together in one pot — a pulao method — and serve the result as “biryani.” The dish may be delicious. It may be colourful and fragrant. But it is technically pulao, regardless of what the menu says. This shortcut has become so widespread that many people have grown up eating pulao labelled as biryani, which makes the confusion understandable.
Does it matter? In the sense that mislabelling food is slightly irritating — yes. In the sense that a delicious plate of rice and masala is still delicious regardless of what you call it — not really.
How to Tell Biryani from Pulao on Your Plate
If you are ever unsure what you are eating, here are three reliable signs you have a real biryani in front of you:
Distinct layers. True biryani shows visible white and yellow-tinged layers of rice, with the darker masala at the base. Pulao is uniform in colour throughout.
Uneven flavour across the plate. Scoop from different parts of the serving. If the bottom tastes dramatically richer and spicier than the top, you have biryani. If it tastes the same throughout, it is pulao.
Whole spices in the rice. Dum biryani typically has whole cardamom pods, star anise, bay leaves, and cinnamon pieces scattered through the rice from the parboiling water — not just ground spice mixed into the dish.
The Final Verdict
Biryani and pulao are not the same dish in different sizes of ambition. They are fundamentally different techniques that produce fundamentally different results.
Pulao is a one-pot rice dish cooked in seasoned liquid — efficient, flavourful, and beautifully suited to weeknight dinners and everyday meals.
Biryani is a two-stage layered preparation finished in sealed steam — complex, theatrical, designed for celebrations, and when made properly, one of the greatest rice dishes in the world.
Neither is better than the other. They serve different purposes, suit different occasions, and represent different aspects of what Indian cooking can do with a handful of rice and the right technique.
The next time someone hands you a plate of rice and calls it biryani — take a spoonful from the bottom. If it tastes completely different from the top, believe them. If it tastes exactly the same throughout, smile and enjoy your very good pulao.
SmartDesiLife.com | Food knowledge for the curious desi kitchen
Related reading on Smart Desi Life
Continue with these closely related guides:
- Restaurant-Style Dal Makhani at Home — No Overnight Soaking Needed
- The Real Science Behind a Perfect Aloo ki Sabji
Useful references
For additional background, official information or specialist guidance, these resources may be useful:
External resources are provided for reader reference. Guidance, prices, opening hours and other time-sensitive information can change, so check the linked source directly when making a decision.