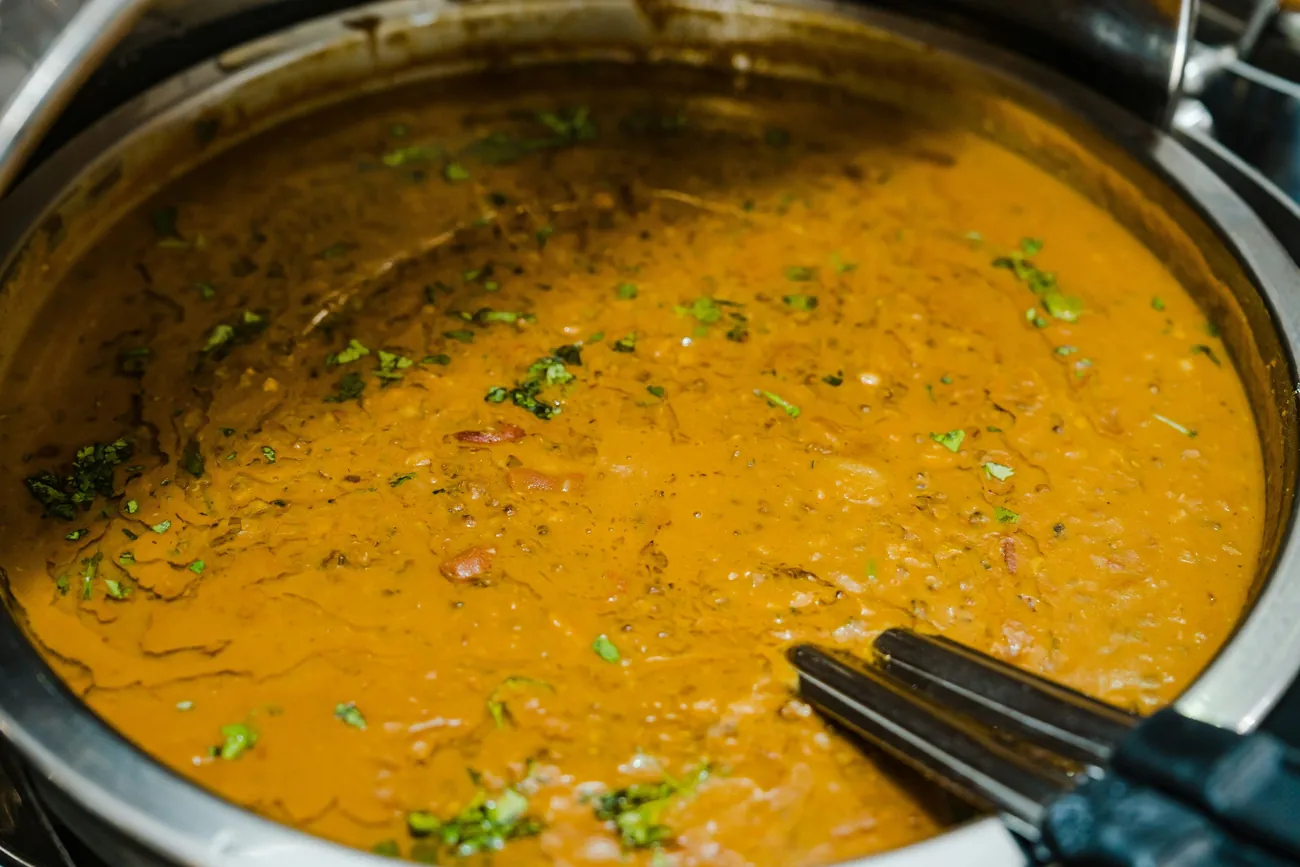
It's six in the evening, you're thinking about making dal makhani for dinner, and then you remember the one thing you forgot to do: soak the urad dal and rajma last night.
Usually, that would mean changing the dinner plan. But you can still make dal makhani without an overnight soak.
A hot-water soak can help the beans begin absorbing moisture, and a pressure cooker can take care of the longer cooking. You still need to allow enough time for both the urad dal and rajma to become completely tender. Older beans, in particular, can take longer than expected.
The other step worth making time for is the final simmer. Once the cooked dal meets the tomato masala, it needs time on a gentle flame to become thick, creamy, and full of flavour.
Here's how to make a comforting pot of dal makhani at home, even when you didn't plan ahead.
What Makes Dal Makhani Different From Everyday Dal?
Dal makhani is a Punjabi dish made mainly with whole black urad dal and a smaller quantity of rajma.
Unlike a lighter yellow dal, it has a thick, velvety consistency. The whole urad softens during cooking and releases starch, giving the gravy much of its body.
Tomatoes, ginger, garlic, cumin, and other spices build the flavour. Butter and cream add the richness that gives the dish its name.
In restaurants and dhabas, dal makhani is often cooked slowly for several hours. At home, a pressure cooker can shorten the initial cooking process, followed by a stovetop simmer.
This version won't necessarily taste identical to dal cooked overnight, but it can still be deeply satisfying.
Recipe Overview
| Detail |
Information |
| Servings |
4 |
| Preparation |
15–20 minutes |
| Quick soaking |
Approximately 45–60 minutes |
| Pressure cooking |
Varies with the cooker and beans |
| Final simmer |
30–40 minutes |
| Cuisine |
Punjabi, North Indian |
| Diet |
Vegetarian |
| Cooking method |
Pressure cooker and stovetop |
Allow extra cooking time if the beans are particularly old or remain firm after the first pressure-cooking cycle.
Ingredients for Dal Makhani
For the Dal
- 1 cup whole black urad dal
- ¼ cup dried rajma (kidney beans)
- Approximately 4 cups fresh water, adjusted according to the pressure cooker's instructions
- 1 teaspoon salt, or to taste
- ½ teaspoon turmeric powder
For the Masala
- 3 tablespoons butter or ghee
- 1 tablespoon oil
- 1 large onion, chopped
- 4 garlic cloves, minced
- 1-inch piece of ginger, grated
- 2 medium tomatoes, pureed
- 1 teaspoon cumin seeds
- 1 teaspoon red chilli powder, or to taste
- 1½ teaspoons coriander powder
- ½ teaspoon garam masala
- Salt as needed
For Finishing
- 3 tablespoons fresh cream or malai
- 1 tablespoon butter
- Fresh coriander leaves
How to Make Dal Makhani Without Overnight Soaking
Step 1: Give the Beans a Hot-Water Soak
Pick through the urad dal and rajma to remove any stones or damaged beans. Rinse them thoroughly.
Transfer them to a large, heat-safe bowl and cover generously with boiling-hot water. There should be enough water for the beans to expand as they absorb moisture.
Cover the bowl and leave it for approximately 45–60 minutes.
This isn't the same as soaking overnight. It simply gives the beans a head start before pressure cooking.
If your rajma is old, it may still feel quite firm after an hour. That's fine, provided you allow enough cooking time afterward.
Drain the soaking water when you're ready to cook.
Step 2: Pressure-Cook the Urad and Rajma
Transfer the drained pulses to your pressure cooker.
Add approximately four cups of fresh water, along with turmeric and the initial salt. Make sure the quantity is appropriate for your cooker.
Beans and lentils expand and may produce foam, so follow the manufacturer's fill limits for pulses.
Cook according to your appliance's instructions for dried beans.
Avoid depending on a fixed number of whistles. Cooking time changes with the cooker, soaking duration, quantity, and age of the beans.
When cooking is complete, let the pressure release using the method recommended for your appliance. Never force the lid open.
Check both beans carefully before moving on.
The urad dal should mash easily against the side of the pot.
The rajma should be completely tender, without a firm or chalky centre. Dried kidney beans must be thoroughly cooked because raw and insufficiently cooked rajma contain harmful lectins.
If the beans remain firm, add water if necessary and continue cooking safely.
Keep the liquid left in the cooker. It contains starch from the dal and will help thicken the finished gravy.
Step 3: Cook the Onion, Ginger and Garlic
Place a heavy-bottomed kadai or deep pan over medium heat.
Add three tablespoons of butter and one tablespoon of oil.
Once warm, add the cumin seeds and let them sizzle briefly.
Add the chopped onion and cook until golden brown, stirring occasionally. This may take around 12–15 minutes, depending on your pan and burner.
Don't use very high heat to rush the process. You want the onion to brown without burning.
Add the ginger and garlic. Stir for another minute or two until fragrant.
Step 4: Prepare the Tomato Masala
Pour in the pureed tomatoes.
Stir them into the onion mixture and cook over medium heat until the raw tomato smell fades.
The masala should become thicker, and you may notice a little fat separating at the edges.
Add the red chilli powder, coriander powder, and garam masala.
Mix well and cook briefly.
If the spices begin sticking to the pan, lower the heat and add a small splash of water.
This stage gives the dal much of its flavour, so allow the tomatoes to cook properly before adding the lentils.
Step 5: Combine the Dal and Masala
Add the pressure-cooked urad dal and rajma to the kadai, along with their cooking liquid.
Stir well.
The mixture may look quite thin at first. Don't worry about that yet.
Bring it to a gentle boil, then lower the heat.
As the dal simmers, the lentils and tomato masala will gradually come together.
Step 6: Simmer Until Creamy
Let the dal simmer gently for approximately 30–40 minutes.
Stir regularly, making sure nothing sticks to the bottom.
During this time, the gravy should thicken and become smoother.
If you want a creamier consistency, press some of the fully cooked urad dal against the side of the pan with your spoon.
The mashed dal will mix into the gravy and thicken it naturally.
Add small amounts of hot water whenever the mixture becomes too thick.
The finished dal should coat a spoon but still be easy to pour into a serving bowl.
Remember that dal makhani becomes thicker as it cools, so don't reduce it until it's dry.
Step 7: Finish With Butter and Cream
Once the dal is creamy and properly seasoned, lower the heat.
Stir in the fresh cream and the remaining tablespoon of butter.
Mix gently and allow everything to heat through.
Taste and adjust the salt.
If you want a richer finish, you can add a little more cream. If you prefer a simpler homemade version, the original amount is enough.
Transfer the dal to a bowl, garnish with coriander, and serve warm.
Quick Soaking vs Overnight Soaking
If you make dal makhani regularly, overnight soaking remains a useful method.
But when you decide to make it on the same day, you have other options.
| Method |
Preparation |
What to expect |
| Overnight soaking |
8–12 hours in water |
More predictable hydration and often shorter cooking |
| Hot-water quick soaking |
Around 45–60 minutes or longer |
A useful same-day option, followed by thorough cooking |
| No soaking |
Begin cooking immediately |
May require substantially longer pressure cooking |
Whichever method you choose, the most important test is whether both types of beans are completely cooked.
How to Get Creamy Dal Makhani at Home
Use Whole Urad Dal
Whole black urad dal creates the characteristic texture of dal makhani.
Split urad cooks differently and won't give exactly the same result.
Don't Throw Away the Cooking Liquid
The starchy water left after pressure cooking is useful.
It helps create a smooth, thick gravy when the dal is simmered with the masala.
Give the Dal Time to Simmer
Pressure cooking softens the beans, but the final simmer helps develop the finished texture and flavour.
Allow enough time for the masala to blend with the dal.
Add Cream at the End
Cream is a finishing ingredient.
Adding it after the dal has developed its consistency gives you better control over the richness.
Keep the Flame Gentle
Dal makhani becomes quite thick as it cooks. High heat can cause it to stick or burn.
Stir frequently and add a little hot water if necessary.
What to Serve With Dal Makhani
Dal makhani goes particularly well with Indian breads and rice.
Butter naan: A classic pairing for thick, creamy dal.
Tandoori roti: A satisfying option when you prefer a simpler bread.
Jeera rice: The gentle cumin flavour complements the rich gravy.
Steamed basmati rice: An easy accompaniment that doesn't require much additional preparation.
You can also serve sliced onion, pickle, or a fresh vegetable side.
How to Fix Common Dal Makhani Problems
| Problem |
What may have happened |
How to fix it |
| Dal is too thick |
Excessive reduction or cooling |
Add hot water gradually and reheat |
| Dal is watery |
Too much liquid or insufficient reduction |
Simmer uncovered and mash some cooked urad |
| Beans remain hard |
Insufficient cooking or older pulses |
Continue cooking fully using a safe method |
| Dal tastes flat |
Underdeveloped masala or insufficient seasoning |
Check salt and allow further gentle simmering |
| Dal sticks to the pan |
Heat is too high or mixture is too thick |
Lower heat and add a little hot water |
| Colour is lighter than expected |
Differences in lentils, masala, and cooking |
Judge by flavour and doneness rather than colour alone |
Why Isn't My Dal Makhani Creamy?
First, check whether the urad is fully cooked.
If it is, mash a little of it into the gravy and give the dal more time to simmer.
You don't necessarily need extra cream to achieve a thick consistency.
Why Does My Dal Taste Bland?
Taste the dal before adding more chilli.
It may need salt, or the tomato masala might not have cooked sufficiently.
A little more simmering can improve the flavour without making the dish excessively spicy.
Can You Make Dal Makhani Without Cream?
Yes.
Whole urad naturally releases starch when cooked and mashed, so you can make a thick gravy even without adding cream.
Use a little butter for flavour if desired, or leave it out.
The result will be lighter and less rich than restaurant-style dal makhani, but it can still be enjoyable.
Can You Make Vegan Dal Makhani?
Yes. Replace butter with a suitable plant-based cooking fat and use unsweetened plant-based cream if you want a creamy finish.
Cashew cream is one option.
Coconut cream can also work, but it may add a noticeable coconut flavour.
Choose the substitute according to your preference rather than expecting it to taste identical to dairy-based dal makhani.
Can You Use an Instant Pot?
An electric pressure cooker can be used for whole urad dal and rajma.
However, the necessary pressure-cooking duration varies with the ingredients and appliance. A fixed 30-minute setting may not be enough for every batch.
Follow your cooker's dried-bean instructions and make sure the rajma is thoroughly cooked.
Once both beans are tender, combine them with the masala and use the appropriate simmering function to finish the recipe.
Can You Use Canned Rajma?
Yes. Since commercially canned kidney beans are already cooked, they can be added during the later stages.
Cook the whole urad separately until completely tender.
Prepare the masala, combine it with the urad, and add drained canned rajma during the final simmer.
Remember that a measured quantity of canned beans isn't equivalent to the same quantity of dried beans.
How to Store and Reheat Dal Makhani
Dal makhani can be prepared in advance.
Cool it promptly in shallow containers, cover, and refrigerate at 4°C or below.
When stored and handled safely, refrigerated leftovers can generally be used within approximately three to four days.
For longer storage, freeze individual portions in suitable containers.
Reheating
Transfer the dal to a saucepan.
Add a little water if it has become thick, then heat thoroughly while stirring.
Don't leave cooked dal sitting at room temperature for several hours.
Frequently Asked Questions
Can I make dal makhani without soaking overnight?
Yes. A hot-water soak followed by thorough pressure cooking is one option. You may also cook without soaking, but the beans can require substantially longer cooking.
Is rajma compulsory in dal makhani?
Rajma is commonly included, but whole black urad dal is the main ingredient. You can adjust the ratio according to your preference.
How can I thicken dal makhani without cream?
Mash some thoroughly cooked urad dal into the gravy and simmer gently until the consistency improves.
Does dal makhani taste better the next day?
Some people prefer it after the flavours have had time to settle. Refrigerate promptly and reheat thoroughly before serving.
Can I freeze homemade dal makhani?
Yes. Divide it into suitable freezer-safe containers, leave room for expansion, and freeze promptly.
Thaw and reheat using safe food-handling practices.
Why is my dal makhani not dark brown?
Colour depends on the lentils, tomato masala, spices, and cooking process. A lighter shade doesn't necessarily mean something is wrong.
Focus on proper cooking, texture, and flavour.
Final Thoughts
Forgetting to soak dal makhani overnight doesn't have to mean abandoning the recipe.
A hot-water soak can help get things started, while the pressure cooker handles the task of softening the whole urad and rajma.
After that, the process is mostly about patience.
Cook the tomato masala properly, let the dal simmer gently, and give the gravy enough time to thicken naturally.
Finish with butter and cream according to your taste.
Once you've made it a few times, you'll begin to recognize the right texture without depending on a particular number of whistles.
And that makes homemade dal makhani much easier to prepare whenever the craving strikes.
Related Articles
- Biryani vs Pulao: Understanding the Difference in Cooking Methods
- Aloo Ki Sabji Recipe: Why Potato Texture and Tadka Matter
- How Much Water to Add for Dal in a Pressure Cooker?
Useful References
- FSSAI – Eat Right India
- ICMR-NIN – Dietary Guidelines for Indians 2024
— END OF STORY —Have a factual correction or suggestion? Get in touch.